I asked her to come over fresh from the shower. And that she did.
 Today I will be focusing on the MAKEUP.
First things first. Don't buy crap. Go through your makeup bag & get rid of practically 80%. It's probably rotted, bad for you & ugly. You don't need a lot of products. Just choose them wisely. They also don't have to be expensive. Again, choose wisely.
 My camera did something weird, but it doesn't matter. You get the jist right? Most of your bags look like this I'm sure. Reduce. Make a separate bag for your little gal to play with & then chuck the rest.
FACE:
I started off by applying a good concealer to trouble spots. Under eyes, blemishes, broken capilaries around the nose... we all have them. I do this with my middle finger to avoid applying too much pressure. I then take my trusty concealer brush & I blend. Blending is KEY to looking fresh & natural.
I use Bare Escentuals make-up, so I of course used this on Kristin. But feel free to use whatever foundation/base/powder you use. Just follow the steps. I really like the Bare Escentuals line because it is light & easy. I've always HATED powders because they go on cakey. But not this one. You can apply as much or as little coverage as is necessary. I blend my brush in the powder, tap of the excess & buff into the skin, working from the jaw bone to the inside of the face & forehead. Repeat as many times as is necessary to give you an even complexion.
Next, I use a bronzing color to add warmth to the face. Everyone likes to be tan right? I start from the top of the cheek bone & sweep to the apple of the cheeks. Don't forget the apples, they are the prime spot for a natural glow. (NOT the cheekbones as the 80's would have you believe.) :) I also lightly sweep some warmth around her chin, forehead & nose to even out the color.
Lastly, I put on a mineral veil to seal, minimize lines, absorb oil & add glow to her face. It works like an airbrush to lock makeup in place weightlessly. LOVE IT.
On to the eyes. Kristin has amazing green eyes & I couldn't wait to get my anxious, little hands on them. Green, hazel & brown eyes can really be played up on by using plums, eggplant & brown colors which is exactly what I wanted to do.
Easy steps for dramatic eyes: (Go darker for night & lighter by day by using the same steps.)
1 - BROWS: Don't forget about them. Don't pluck & wax & then leave them there naked. Find an angle brush for your makeup gear. Then use a shade (I just use eyeshadow) similar to your own browns, but warmer. Browns are always good. Use your angle brush & brown shadow to lightly sweep the color through your brows, defining the larger portion closer to your nose & the ends to get an even, strong brow. (Eyebrows thin with age & a defined brow will balance your face & add a frame for your eyes.) BUT!... Don't go over board.
 2 - EYES: TWO colors are needed for your eyes. A highlighter shadow & a contour shadow. (However, I DO use a primer from MAC under my shadow. This will make your shadow stay put, not crease & enhance the color of whatever shadow you put over it.) LOVE IT.
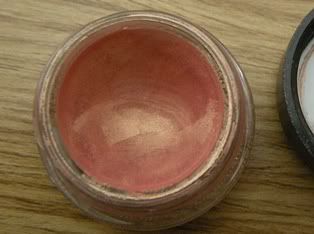 Apply the primer all over lid & just below the orbital bone (feel the bone which your eyebrow lies on & let your finger slide down to feel where it stops). Next, use a light highlighter color (like below) & sweep it just under the brow. This will make your eye appear more open. You can also sweep that color on the inside & outside corners of your eyes, as well as all over your lid.
Next I take my contour color & apply it just UNDER the orbital bone with my shadow brush. The important part of this step is to blend. You must blend both colors so there isn't a hard line where they intersect. I do this by sweeping the contour color just under the orbital bone & then with circular motions, blend the colors with my brush until I get the desired shade.

These are the only other contour shadows I have & it's all I need.
{Bed Head shadow palette image here.}
 Highlighting eyeshadow.
{Ricepaper MAC eyeshadow image here.}
3 - LINER. Girls. Put down your liners. Please for the LOVE, stop applying eye-LINER. It shouldn't be called that. I am not a fan of seeing a line drawn on the top of someone's lid. I think a eyeliner should enhance the illusion of a thicker lash base & define the eye, not the line. This means get the line as close to the lashes as possible. Then smudge the line subtly with you finger or with a Q-tip. You can do this on the bottom for a more dramatic eye, but please do it ON TOP of the lash line. NOT below. I would recommend a liner in a deep plum, brown or graphite color. And if you don't think I've written the word LINE enough... LINE.
Check this out. But please, forgo the blue liner for your grocery errands. :)
How To Apply Pencil Eyeliner
4 - Apply mascara. Less is more girls. Start at the lash root base & extend toward the ends. Work your way around & then hold your brush perpendicularly & touch up the ends to get maximum length.
5 - Finish your face with a cool, summer gloss. Surpringly my favorite is from Bath & Body Works, Co. Bigelow Mentha Lip Tint. My fav is Plum Mint. Each shade is infused with peppermint oil & makes your lips not only shine with color, but tingle with a cooling sensation. And as a nifty, little perk, it doesn't make your breathe too bad either. :) I gave some to Kristin to try since I usually buy in bulk when they're on sale.

 Viola!
I hope all of these little tips help. I'm excited because I will be doing my first wedding application this month. FUN!
Now go get beautiful like Kristin! It's easy. I saw Kristin the next morning & I laughed... "Did you sleep with your makeup on?" And she said, "No I did it myself!" I was so proud. She also got to choose from my closet & accessories for the fun of it. I hope you had fun on your hot date Kris. You deserved it! You're gorgeous inside & out. Hugs.


This comment has been removed by the author.
ReplyDeleteYou are so good with everything!!!!
ReplyDeleteCan you help me with my makeup and hair?
Pretty please
Oooh! I just watched the eyeliner video- that's a great one. I always have the most trouble with that one.
ReplyDeleteThanks Heather, it was a lot FUN:) Thanks for all of the good tips.
ReplyDeleteOh yea, THANKS for the lip gloss. I LOVE IT!!!
ReplyDeleteyou did great! you are so sweet to do that too. Im not going to lie though, i love fun colors on the eyes, and I have worn blue...and Im not ashamed to say it. I also have a bright green and redish color...MAC..they are wild,c crazy and fun colors.
ReplyDeleteAnother tip for eyelashes..LATISSE...love it!!! I sell it if you ever have someone who wants it.
Although Kristin doesn't need makeup, your skills are amazing girl! Thanks for the tips, I definitely need them!
ReplyDeletewow she looks great! I need to learn to put on makeup and this helped, thanks Heather!
ReplyDelete